PSP8 HEADER TUTORIAL 01 >> The Notebook.
heldonto_you requested a tutorial for starry effects in this header.
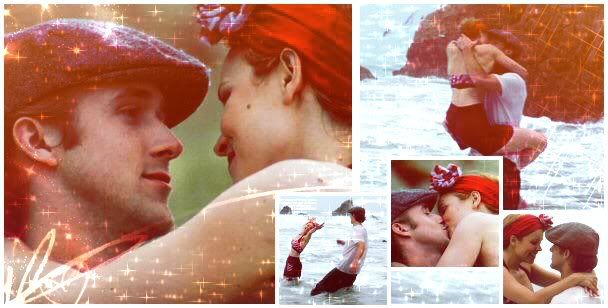
But I don't have the original for that header, and I don't remember what I did to make it look like that exactly. So I'll start from scratch. This tutorial teaches you how to go from this to this.
I'm asuming you all know the basics to any version of PSP to accomplish the look of this header. There's really only one step you need to know to make the sparkly star effect, but I'll do a full tutorial and show how I got the header to look like that exactly.
First start off with your base header. (Here's mine)
Duplicate it twice. Set the top one to softlight then go to effects>>artistic effects>>aged newspaper>>10 years. Then set the bottom layer to screen. It should now look like this.
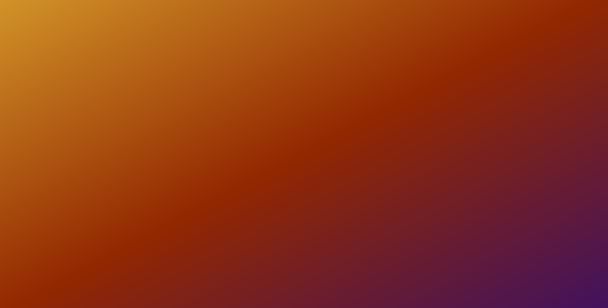
Now, make a new raster layer in between the screen and softlight layer. Fill it with this gradient. (made by crumblingwalls) and set it to lighten. Then duplicate the gradient layer and mirror it. (image>>mirror) make sure it's at lighten too. You should now have this. [Keep in mind that it might look ugly on your header, so you can experiment with different gradients, settings and opacitys to get it to look the way you want.]
Now for the starry effect. For this you're going to have to use brushes. Make a new raster layer on top of everything else. I used star brushes made by dorky_duck, scribble brushes made by teh_indy, and tiny font and heart brushes by ohpaintbrush and jeweledicecream. Again, white paint and brush the stars, scribbles, etc where you want them. I used the eraser tool to erase the stars from their faces. This is pretty much what I put on the header:

Then set the raster layer that has all the brushes painted on it to dodge. You'll have to adjust the opacity to make it glow, and mine is set at 68% opacity. It now looks like this.
Now, I'm going to add text. you can make the font glow as well. Make a new raster layer, and add the text. [make the text as a new vector layer] I put "they fell in love" with 'black jack' font size 26 that you can download at www.dafont.com, and then set the font layer to 62% opacity and at dodge. Then I went to effects>>3D effects>>drop shadow to give the font a drop shadow (go figure) and put it at this setting:

This is what your pallette should look like if you followed these steps exactly:

Merge all layers and you're finished =D Hope this was helpful!

*please don't ask me how to install gradients or brushes into PSP. Also, I picked this tutorial first because it was easiest. Your other requests will be fullfilled soon <33 Feel free to request a tutorial for any of my graphics at this post. Not here please.
But I don't have the original for that header, and I don't remember what I did to make it look like that exactly. So I'll start from scratch. This tutorial teaches you how to go from this to this.
I'm asuming you all know the basics to any version of PSP to accomplish the look of this header. There's really only one step you need to know to make the sparkly star effect, but I'll do a full tutorial and show how I got the header to look like that exactly.
First start off with your base header. (Here's mine)
Duplicate it twice. Set the top one to softlight then go to effects>>artistic effects>>aged newspaper>>10 years. Then set the bottom layer to screen. It should now look like this.
Now, make a new raster layer in between the screen and softlight layer. Fill it with this gradient. (made by crumblingwalls) and set it to lighten. Then duplicate the gradient layer and mirror it. (image>>mirror) make sure it's at lighten too. You should now have this. [Keep in mind that it might look ugly on your header, so you can experiment with different gradients, settings and opacitys to get it to look the way you want.]
Now for the starry effect. For this you're going to have to use brushes. Make a new raster layer on top of everything else. I used star brushes made by dorky_duck, scribble brushes made by teh_indy, and tiny font and heart brushes by ohpaintbrush and jeweledicecream. Again, white paint and brush the stars, scribbles, etc where you want them. I used the eraser tool to erase the stars from their faces. This is pretty much what I put on the header:
Then set the raster layer that has all the brushes painted on it to dodge. You'll have to adjust the opacity to make it glow, and mine is set at 68% opacity. It now looks like this.
Now, I'm going to add text. you can make the font glow as well. Make a new raster layer, and add the text. [make the text as a new vector layer] I put "they fell in love" with 'black jack' font size 26 that you can download at www.dafont.com, and then set the font layer to 62% opacity and at dodge. Then I went to effects>>3D effects>>drop shadow to give the font a drop shadow (go figure) and put it at this setting:
This is what your pallette should look like if you followed these steps exactly:
Merge all layers and you're finished =D Hope this was helpful!
*please don't ask me how to install gradients or brushes into PSP. Also, I picked this tutorial first because it was easiest. Your other requests will be fullfilled soon <33 Feel free to request a tutorial for any of my graphics at this post. Not here please.