#1 Tutorial

>>

First sharpen your base (Filter >> Sharpen >> Sharpen)

Then go to Filter >> Surface Blur, set Radius to 5 and Threshold to 5. And/or take blur tool and blur the sharpened and pixel-y areas, so skin looks clean and smooth.

Duplicate the base three times, set first two duplicated layers to Screen 100%, the third copy set to Soft Light 100% and Desaturate (Image >> Adjustments >> Desaturate or Shift+Ctrl+U).

Now the coloring part (Actually you can stop after any of these steps and get very nice coloring):
Add this gradient and set it to Hard Light 80%

>>

Next add this gradient and set it to Multiply 100%

>>

Next gradient, set it to Soft Light 100%

>>

And the last one - set to Soft Light 100%

>>

Next duplicate the base, drag it on top, desaturate and set to Soft Light 100%

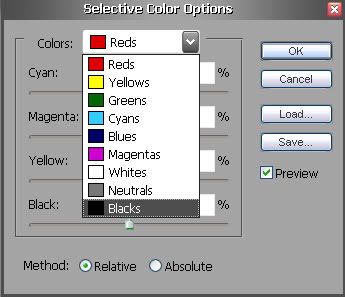
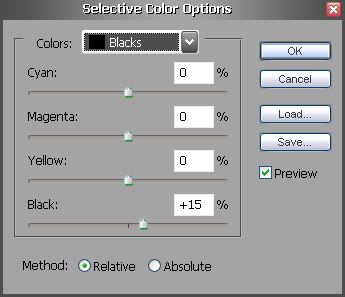
Next add a selective color layer (Layer--->New Adjustment Layer--->Selective Color) and choose Blacks:

Set the black color to +15%

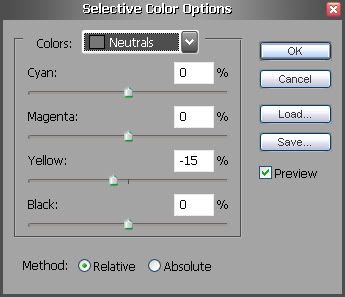
Then go to neutrals and set the yellow to -15%

This is what you got:

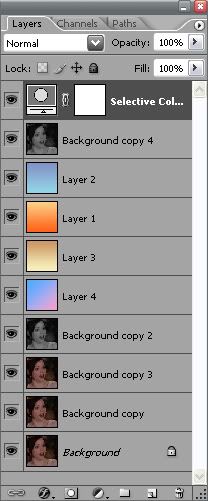
And this is what my Layer Palette looks like if you got confused:

Layer >> Flatten Image
Very nice add to icon is rounded border:

>>

Make a selection 98x98 px

Select >> Modify >> Smooth
Set Sample Radius to 5 pixels

Next Copy your selection and past it on new 100x100 Transparent canvas.
Save it as *gif document and your done!
