Tutorial 03: Kate "Lost"
Hey,
Quick and easy as pie tut requested by katblah333_2000.
Program: Adobe Photshop 7
Image Heavy: Maybe a bit...
Difficulty: Easy.
We're going from this:
to this: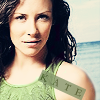
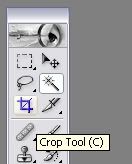
1. Get your picture you want to make an icon of. I chose a pic of Kate from the new *squeals* season 2 Character Promo pics at Lost-Media. Crop it too 100x100 pixels using the crop tool:
<---
Go 'Filter'-->'Sharpen'-->'Sharpen'. But only if your image needs it. I chose to skip this step coz the picture was already high quality. This is my base:

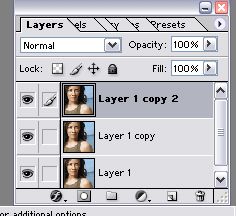
2. Duplicate your base 2 times. So now you should have 3 copies of your icon. Layer pallete should look like this:
Set the middle layer to screen:

-->
And the top layer to soft light:

-->
3. Create a new layer ['Layer'-->'New'-->'Layer'] and fill it with a really dark blue colour. I used #011637. Set the blend mode to Exclusion.

-->
Merge Visible ['Layer'-->'Merge Visible'].
4. Duplicate your base and go:
'Image'-->'Adjustments'-->'Hue & Saturation'. This box should pop up:
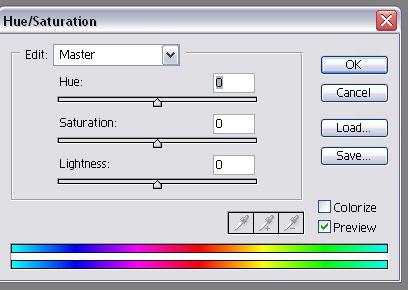
In the 'Hue' option type in 50. Kate should come out all green and alien looking - scary, but don't worry we'll fix that ;)

-->
5. Let's take our handy-dandy friend Mr. Eraser:

.
My settings were: Brush: 5px; Mode: Brush; Opacity: 100%. Now we're going to erase everything off Kate except for her shirt. So it should now look something like this:

-->
Merge all layers.
6. Duplicate your base. Desaturate it ['Image'-->'Adjustments'-->'Desaturate'] and set it to 'Soft Light'.

-->
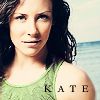
7. Text time. I hate text. It's evil. Anyway, I went for something simple and wrote 'KATE'. Settings... Font: Garamond; Size: 10pt; Anti-aliasing: Sharp; Tracking: 600. To be able to use the tracking, highlight your text, click on this button, which is near the text toolbar at the top:

Then thing should pop up:
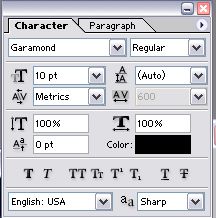
See the 'AV' with the <--> thing under it? Put 600 in the box. Or whatever tracking you want.

-->
8. I thought it looked boring like that so I used the 'Rectangle Marquee Tool':

And drew a rectangle to the same size as the text on the icon. Then I filled it in with a green colour from the icon, #7F9066. Then drag the text layer on top of the rectangle.

-->
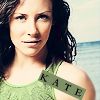
9. I thought it was still missing something so I rotated the Text & Rectangle so it was on a rectangle. You can rotate by holding down 'Ctrl' & 'T'.

-->
10. Finally I set the text layer to 'Soft Light' and lowered the Opacity of the rectangle to 75%.

-->
Teh End!
- You can copy this Tut exactly
- You can take this icon
- If you do the above please credit
Lozzyxx
Previous Tuts


Quick and easy as pie tut requested by katblah333_2000.
Program: Adobe Photshop 7
Image Heavy: Maybe a bit...
Difficulty: Easy.
We're going from this:

to this:
1. Get your picture you want to make an icon of. I chose a pic of Kate from the new *squeals* season 2 Character Promo pics at Lost-Media. Crop it too 100x100 pixels using the crop tool:

<---
Go 'Filter'-->'Sharpen'-->'Sharpen'. But only if your image needs it. I chose to skip this step coz the picture was already high quality. This is my base:

2. Duplicate your base 2 times. So now you should have 3 copies of your icon. Layer pallete should look like this:

Set the middle layer to screen:

-->

And the top layer to soft light:

-->

3. Create a new layer ['Layer'-->'New'-->'Layer'] and fill it with a really dark blue colour. I used #011637. Set the blend mode to Exclusion.

-->

Merge Visible ['Layer'-->'Merge Visible'].
4. Duplicate your base and go:
'Image'-->'Adjustments'-->'Hue & Saturation'. This box should pop up:

In the 'Hue' option type in 50. Kate should come out all green and alien looking - scary, but don't worry we'll fix that ;)

-->

5. Let's take our handy-dandy friend Mr. Eraser:

.
My settings were: Brush: 5px; Mode: Brush; Opacity: 100%. Now we're going to erase everything off Kate except for her shirt. So it should now look something like this:

-->

Merge all layers.
6. Duplicate your base. Desaturate it ['Image'-->'Adjustments'-->'Desaturate'] and set it to 'Soft Light'.

-->

7. Text time. I hate text. It's evil. Anyway, I went for something simple and wrote 'KATE'. Settings... Font: Garamond; Size: 10pt; Anti-aliasing: Sharp; Tracking: 600. To be able to use the tracking, highlight your text, click on this button, which is near the text toolbar at the top:

Then thing should pop up:

See the 'AV' with the <--> thing under it? Put 600 in the box. Or whatever tracking you want.

-->

8. I thought it looked boring like that so I used the 'Rectangle Marquee Tool':

And drew a rectangle to the same size as the text on the icon. Then I filled it in with a green colour from the icon, #7F9066. Then drag the text layer on top of the rectangle.

-->

9. I thought it was still missing something so I rotated the Text & Rectangle so it was on a rectangle. You can rotate by holding down 'Ctrl' & 'T'.

-->

10. Finally I set the text layer to 'Soft Light' and lowered the Opacity of the rectangle to 75%.

-->
Teh End!
- You can copy this Tut exactly
- You can take this icon
- If you do the above please credit
Lozzyxx
Previous Tuts
