framedinblood Tutorial #4
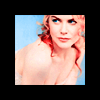
This 
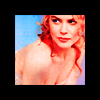
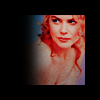
becomes this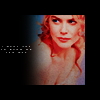
Made in Photoshop 7. Uses Selective Colouring and Hue/Saturation.
01. After cropping the image and resizing the selection you are left with this. Auto Contrast and Auto Color to clean it up. Create a new layer and move it to the bottom, fill it with black.

02. Duplicate the base and set it to Soft Light at 100%.

03. Now is time for the Selective Colour. Here is where to go to get to it.
Reds: Cyan +100.
Yellows: Cyan -100 Yellow -100.
Magentas: Cyan +100 Magenta -100.

04. Selective Colour again.
Reds: Cyan -100.
Yellows: Cyan -100 Yellow -100.
Neutrals: Cyan +100.

05. Selective Colour, yet again.
Cyans: Cyan +100 Yellow -100.
Blues: Cyan +100 Yellow -100.

06. Go to Hue/Saturation and put the Saturation at +40.
07. Take this texture, resized to 70x70, by sanami276 @ fangirls_inc and set it to Overlay at 100%.
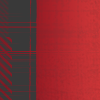
08. Take this texture by sanami276 @ fangirls_inc and set it to Mulitply at 40%.

09. Take this texture, resized to 70x70, by sanami276 @ fangirls_inc and set it to Multiply at 100%.

10. Use the Rectangle Tool in black at Normal 100%. Gaussisn Blue at 7.1 pixels.
10. Finish it up by using a text brush or adding your own text. I used a text brush in white.
becomes this
Made in Photoshop 7. Uses Selective Colouring and Hue/Saturation.
01. After cropping the image and resizing the selection you are left with this. Auto Contrast and Auto Color to clean it up. Create a new layer and move it to the bottom, fill it with black.
02. Duplicate the base and set it to Soft Light at 100%.
03. Now is time for the Selective Colour. Here is where to go to get to it.
Reds: Cyan +100.
Yellows: Cyan -100 Yellow -100.
Magentas: Cyan +100 Magenta -100.
04. Selective Colour again.
Reds: Cyan -100.
Yellows: Cyan -100 Yellow -100.
Neutrals: Cyan +100.
05. Selective Colour, yet again.
Cyans: Cyan +100 Yellow -100.
Blues: Cyan +100 Yellow -100.
06. Go to Hue/Saturation and put the Saturation at +40.
07. Take this texture, resized to 70x70, by sanami276 @ fangirls_inc and set it to Overlay at 100%.
08. Take this texture by sanami276 @ fangirls_inc and set it to Mulitply at 40%.
09. Take this texture, resized to 70x70, by sanami276 @ fangirls_inc and set it to Multiply at 100%.
10. Use the Rectangle Tool in black at Normal 100%. Gaussisn Blue at 7.1 pixels.
10. Finish it up by using a text brush or adding your own text. I used a text brush in white.