framedinblood Tutorial #1
This 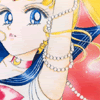
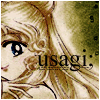
becomes this
Made in Photoshop 7. Icon placed 2nd at senshi_awards
01. After cropping the image from The Oracle and resizing the selection you are left with this. Auto Contrast and Auto Color to clean it up.

02. Duplicate the base and set it to Soft Light at 100%.


03. Fill a new layer with #0A1626 and set that layer to Exculsion at 100%.


04. Fill a new layer with #E6E6E6 and set it to Color Burn at 100% to bring out more contrast.


05. Duplicate the base and move it to the top. Desaturate it and use Auto Contrast to clean it up. Set it to Multiply at 100%.
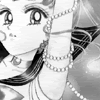
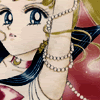
06. Add border of choice. This icon has a 1px border in #7A0026. From here you can also add text of choice.


Other icons I've made doing this.
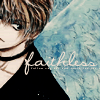

If you use any of the icons above, credit framedinblood or __3ppl.

becomes this

Made in Photoshop 7. Icon placed 2nd at senshi_awards
01. After cropping the image from The Oracle and resizing the selection you are left with this. Auto Contrast and Auto Color to clean it up.

02. Duplicate the base and set it to Soft Light at 100%.


03. Fill a new layer with #0A1626 and set that layer to Exculsion at 100%.


04. Fill a new layer with #E6E6E6 and set it to Color Burn at 100% to bring out more contrast.


05. Duplicate the base and move it to the top. Desaturate it and use Auto Contrast to clean it up. Set it to Multiply at 100%.


06. Add border of choice. This icon has a 1px border in #7A0026. From here you can also add text of choice.


Other icons I've made doing this.
If you use any of the icons above, credit framedinblood or __3ppl.