Tutorial #18
Requested by fivecrimes & royalacid
Created in PSE 4.0
Go from
to
Tutorial #18
1. This is a simple colouring tutorial using 2 Prison Break caps: Michael & Sara.
2. Drag both caps into the icon and transform to around 9% of their original size.
Crop Michael to the bottom, and Sara over top. Flip Sara's layer horizontally.

+
~~>
3. Use the Healing Brush Tool to remove the logo from Sara's hair.
Now we have our base.

~~>
4. Duplicate base and set to Screen 50% opacity.

5. Fill layer with #001C3A and set to Exclusion 30% opacity.

6. Fill layer with #E2A5A0 and set to Overlay 30% opacity.

7. Fill layer with #8BE0FD and set to Soft Light 60% opacity.

8. Fill layer with #C9DBEB and set to Color Burn 60% opacity.

9. Fill layer with #CAAD98 and set to Overlay 30% opacity.

10. Fill layer with #E9AF6A and set to Soft Light 60% opacity.

11. Duplicate base. Bring to top and set to Soft Light 100% opacity.

12. Go to Layer -> New Adjustment Layer -> Hue/Saturation.
Adjust Saturation settings accordingly:
Master +28
Yellows -54

13. Go to Layer -> New Adjustment Layer -> Brightness/Contrast.
Adjust Contrast settings to +7.

14. Fill layer with #CAAD98 and set to Soft Light 65% opacity.

15. Fill layer with #53BBE1 and set to Saturation 10% opacity.

16. Fill layer with #2A0606 and set to Exclusion 80% opacity.

17. Stamp a new layer (Ctrl+Alt+Shift+E) and set to Soft Light 60% opacity.

18. Stamp a new layer (Ctrl+Alt+Shift+E) and Sharpen 50% opacity.

19. Paste gradient by talkofcake and set to Soft Light 90% opacity.
Rotate gradient 90 degrees to the left.

~~>
~~>
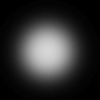
20. Paste white blob (of doom) by desiderio and set to Screen 48% opacity.
Nudge blob horizontally to the right.

~~>
21. One final step. The green line above Sara's shoulder bothered me, so I used the Smudge Tool and smudged the green to the left (and thus out of the icon). Now, it's all one dark colour above her shoulder.

~~>
And, we're done!
Other examples of the same colouring technique:


Cross-posted at elementheads.
Hope you enjoyed the tut. Comments are ♥... thanx!
Created in PSE 4.0
Go from

to

Tutorial #18
1. This is a simple colouring tutorial using 2 Prison Break caps: Michael & Sara.
2. Drag both caps into the icon and transform to around 9% of their original size.
Crop Michael to the bottom, and Sara over top. Flip Sara's layer horizontally.

+

~~>

3. Use the Healing Brush Tool to remove the logo from Sara's hair.
Now we have our base.

~~>

4. Duplicate base and set to Screen 50% opacity.

5. Fill layer with #001C3A and set to Exclusion 30% opacity.

6. Fill layer with #E2A5A0 and set to Overlay 30% opacity.

7. Fill layer with #8BE0FD and set to Soft Light 60% opacity.

8. Fill layer with #C9DBEB and set to Color Burn 60% opacity.

9. Fill layer with #CAAD98 and set to Overlay 30% opacity.

10. Fill layer with #E9AF6A and set to Soft Light 60% opacity.

11. Duplicate base. Bring to top and set to Soft Light 100% opacity.

12. Go to Layer -> New Adjustment Layer -> Hue/Saturation.
Adjust Saturation settings accordingly:
Master +28
Yellows -54

13. Go to Layer -> New Adjustment Layer -> Brightness/Contrast.
Adjust Contrast settings to +7.

14. Fill layer with #CAAD98 and set to Soft Light 65% opacity.

15. Fill layer with #53BBE1 and set to Saturation 10% opacity.

16. Fill layer with #2A0606 and set to Exclusion 80% opacity.

17. Stamp a new layer (Ctrl+Alt+Shift+E) and set to Soft Light 60% opacity.

18. Stamp a new layer (Ctrl+Alt+Shift+E) and Sharpen 50% opacity.

19. Paste gradient by talkofcake and set to Soft Light 90% opacity.
Rotate gradient 90 degrees to the left.

~~>

~~>

20. Paste white blob (of doom) by desiderio and set to Screen 48% opacity.
Nudge blob horizontally to the right.

~~>

21. One final step. The green line above Sara's shoulder bothered me, so I used the Smudge Tool and smudged the green to the left (and thus out of the icon). Now, it's all one dark colour above her shoulder.

~~>

And, we're done!
Other examples of the same colouring technique:


Cross-posted at elementheads.
Hope you enjoyed the tut. Comments are ♥... thanx!