Tutorial #15
Requested by lilkittykat_27.
Created in PSE 4.0
Go from
to
Tutorial #15
1. This is a simple colouring tutorial using THIS screencap from Heroes.
2. Crop the base half way down the icon. Duplicate base and set to Screen 100%.

~~>
3. Fill layer with #001C3A and set to Exclusion 30% opacity.

4. Fill layer with #C9DBEB and set to Color Burn 50% opacity.

5. Fill layer with #FIAC5E and set to Soft Light 30% opacity.

6. Fill layer with #CAAD98 and set to Overlay 30% opacity.

7. Stamp a new layer (Ctrl+Alt+Shift+E) and then sharpen it. Fade opacity to 50%.

8. Go to Layer -> New Adjustment Layer -> Brightness/Contrast.
Adjust Contrast settings to +10.

9. Go to Layer -> New Adjustment Layer -> Levels.
Adjust RGB settings accordingly:
0 ~ 1.13 ~ 255

10. Go to Layer -> New Adjustment Layer -> Hue/Saturation.
Adjust Saturation settings accordingly:
Master +15
Reds -20

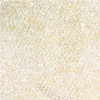
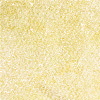
11. Take the following texture by waytoexist. Go to Enhance -> Adjust Color -> Color Variations.
Under Midtones, decrease the blue twice and increase the red once.
Drag the texture over the blank white space.
~~>
~~>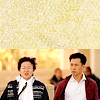
12. Use the eyedropper tool to find a pretty colour in the icon.
Add the following text in Century Gothic (all caps) #BD8B5A:
this is how -> 14pt
we roll -> 19pt

And, we're done!
Cross-posted at elementheads & icon_tutorial.
Hope you enjoyed the tut. Comments are ♥... thanx!
Created in PSE 4.0
Go from

to

Tutorial #15
1. This is a simple colouring tutorial using THIS screencap from Heroes.
2. Crop the base half way down the icon. Duplicate base and set to Screen 100%.

~~>

3. Fill layer with #001C3A and set to Exclusion 30% opacity.

4. Fill layer with #C9DBEB and set to Color Burn 50% opacity.

5. Fill layer with #FIAC5E and set to Soft Light 30% opacity.

6. Fill layer with #CAAD98 and set to Overlay 30% opacity.

7. Stamp a new layer (Ctrl+Alt+Shift+E) and then sharpen it. Fade opacity to 50%.

8. Go to Layer -> New Adjustment Layer -> Brightness/Contrast.
Adjust Contrast settings to +10.

9. Go to Layer -> New Adjustment Layer -> Levels.
Adjust RGB settings accordingly:
0 ~ 1.13 ~ 255

10. Go to Layer -> New Adjustment Layer -> Hue/Saturation.
Adjust Saturation settings accordingly:
Master +15
Reds -20

11. Take the following texture by waytoexist. Go to Enhance -> Adjust Color -> Color Variations.
Under Midtones, decrease the blue twice and increase the red once.
Drag the texture over the blank white space.

~~>

~~>

12. Use the eyedropper tool to find a pretty colour in the icon.
Add the following text in Century Gothic (all caps) #BD8B5A:
this is how -> 14pt
we roll -> 19pt

And, we're done!
Cross-posted at elementheads & icon_tutorial.
Hope you enjoyed the tut. Comments are ♥... thanx!